[av_one_full first min_height=” vertical_alignment=’av-align-top’ space=” row_boxshadow=” row_boxshadow_color=” row_boxshadow_width=’10’ custom_margin=” margin=’0px’ mobile_breaking=” mobile_column_order=” min_col_height=” padding=” svg_div_top=” svg_div_top_color=’#333333′ svg_div_top_width=’100′ svg_div_top_height=’50’ svg_div_top_max_height=’none’ svg_div_top_flip=” svg_div_top_invert=” svg_div_top_front=” svg_div_top_opacity=” svg_div_top_preview=” svg_div_bottom=” svg_div_bottom_color=’#333333′ svg_div_bottom_width=’100′ svg_div_bottom_height=’50’ svg_div_bottom_max_height=’none’ svg_div_bottom_flip=” svg_div_bottom_invert=” svg_div_bottom_front=” svg_div_bottom_opacity=” svg_div_bottom_preview=” border=” border_style=’solid’ border_color=” radius=” column_boxshadow=” column_boxshadow_color=” column_boxshadow_width=’10’ background=’bg_color’ background_color=” background_gradient_direction=’vertical’ background_gradient_color1=’#000000′ background_gradient_color2=’#ffffff’ background_gradient_color3=” src=” background_position=’top left’ background_repeat=’no-repeat’ highlight=” highlight_size=” animation=” link=” linktarget=” link_hover=” title_attr=” alt_attr=” mobile_display=” mobile_col_pos=’0′ id=” custom_class=” template_class=” aria_label=” av_uid=” sc_version=’1.0′]
[av_heading heading=’How to Make a Bucket Hat with Automatic Sewing Machine?’ tag=’h2′ style=’blockquote modern-quote modern-centered’ subheading_active=” show_icon=” icon=’ue800′ font=’entypo-fontello’ size=” av-medium-font-size-title=” av-small-font-size-title=” av-mini-font-size-title=” subheading_size=” av-medium-font-size=” av-small-font-size=” av-mini-font-size=” icon_size=” av-medium-font-size-1=” av-small-font-size-1=” av-mini-font-size-1=” color=” custom_font=” subheading_color=” seperator_color=” icon_color=” margin=” margin_sync=’true’ padding=’10’ icon_padding=’10’ headline_padding=” headline_padding_sync=’true’ link=” link_target=” id=” custom_class=” template_class=” element_template=” one_element_template=” av_uid=’av-l4yxrlzb’ sc_version=’1.0′ admin_preview_bg=”][/av_heading]
[av_image src=’https://jylmachine.com/wp-content/uploads/2022/06/How-to-make-bucket-hats-with-sewing-machine-300×86.jpg’ attachment=’1664′ attachment_size=’medium’ copyright=” caption=” image_size=’featured’ styling=” align=’center’ font_size=” overlay_opacity=’0.4′ overlay_color=’#000000′ overlay_text_color=’#ffffff’ animation=’no-animation’ hover=” appearance=” link=” target=” title_attr=” alt_attr=” img_scrset=” lazy_loading=’disabled’ id=” custom_class=” template_class=” element_template=” one_element_template=” av_element_hidden_in_editor=’0′ av_uid=’av-l4yzcjvg’ sc_version=’1.0′ admin_preview_bg=”][/av_image]
[av_social_share title=” buttons=’custom’ btn_action=” share_facebook=’aviaTBshare_facebook’ share_twitter=’aviaTBshare_twitter’ share_whatsapp=’aviaTBshare_whatsapp’ share_pinterest=’aviaTBshare_pinterest’ share_reddit=’aviaTBshare_reddit’ share_linkedin=’aviaTBshare_linkedin’ share_vk=’aviaTBshare_vk’ yelp_link=’https://www.yelp.com’ facebook_profile=” twitter_profile=” whatsapp_profile=” pinterest_profile=” reddit_profile=” linkedin_profile=” tumblr_profile=” vk_profile=” mail_profile=” yelp_profile=” five_100_px_profile=” behance_profile=” dribbble_profile=” flickr_profile=” instagram_profile=” skype_profile=” soundcloud_profile=” vimeo_profile=” xing_profile=” youtube_profile=” style=’av-social-sharing-box-circle’ alignment=’av-social-sharing-center’ alb_description=” id=” custom_class=” template_class=” av_uid=” sc_version=’1.0′ admin_preview_bg=”]
[av_textblock textblock_styling_align=” textblock_styling=” textblock_styling_gap=” textblock_styling_mobile=” size=” av-medium-font-size=” av-small-font-size=” av-mini-font-size=” font_color=” color=” id=” custom_class=” template_class=” element_template=” one_element_template=” av_uid=” sc_version=’1.0′ admin_preview_bg=”][/av_textblock]
[av_textblock textblock_styling_align=” textblock_styling=” textblock_styling_gap=” textblock_styling_mobile=” size=” av-medium-font-size=” av-small-font-size=” av-mini-font-size=” font_color=” color=” id=” custom_class=” template_class=” element_template=” one_element_template=” av_uid=’av-l4yzczgr’ sc_version=’1.0′ admin_preview_bg=”]
Bucket hats are a stylish accessory that can finish almost any type of attire. They are likewise quite useful at protecting your hair from the sun. Rather than running off to the store as well as getting one, why not make you own? They are easy and also fast to make. You can make a brand-new hat for every celebration once you understand what to do!
[/av_textblock]
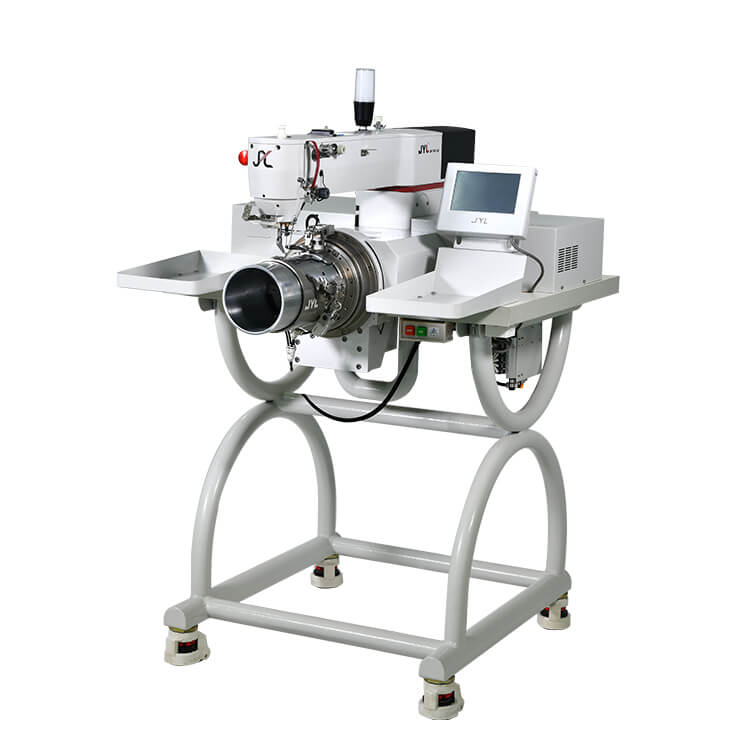
[av_image src=’https://jylmachine.com/wp-content/uploads/2022/06/How-to-make-a-bucket-hat-with-sewing-machine-300×185.jpg’ attachment=’1665′ attachment_size=’medium’ copyright=” caption=” image_size=’entry_with_sidebar’ styling=” align=’center’ font_size=” overlay_opacity=’0.4′ overlay_color=’#000000′ overlay_text_color=’#ffffff’ animation=’no-animation’ hover=” appearance=” link=’manually,https://jylmachine.com/product/baseball-cap-visor-sewing-machine/’ target=’_blank’ title_attr=” alt_attr=” img_scrset=” lazy_loading=’disabled’ id=” custom_class=” template_class=” element_template=” one_element_template=” av_element_hidden_in_editor=’0′ av_uid=’av-l4yzzh9v’ sc_version=’1.0′ admin_preview_bg=”][/av_image]
[av_textblock textblock_styling_align=” textblock_styling=” textblock_styling_gap=” textblock_styling_mobile=” size=” av-medium-font-size=” av-small-font-size=” av-mini-font-size=” font_color=” color=” id=” custom_class=” template_class=” element_template=” one_element_template=” av_uid=’av-l4z01l9m’ sc_version=’1.0′ admin_preview_bg=”]
Component 1: Cutting the Pieces.
1. Choose your fabric.
You will certainly require two various shades, one of the outside of the hat and one for the within. Take into consideration utilizing cotton for one side and also canvas or jeans for the various other.
2. Cut 2 8-inch (20.32-centimeter) circles.
You will need to cut one circle out of each fabric. This will be the top of the hat. [1] You will be utilizing 1/2- inch (1.27-centimeter) seam allocations. If you have a really little head, you may wish to cut a smaller circle. You’ll need to cut a bigger circle if you have a bigger head.
3. Cut the body items.
You will certainly require 2 12 by 3-inch (30.48 by 7.62-centimeter) rectangles for each fabric. You should have 4 rectangles amount to. [2] Make the rectangular shapes 4 inches (10.16 centimeters) wide instead if you desire a taller hat.
If you cut a bigger/smaller circle, after that cut each rectangular shape so that it gauges half of the circumference.
4. Cut the border pieces.
You will need four identical pieces total, two from each fabric. The items need to be 3 1/2 inches (8.89 centimeters) large. They need to be 12 inches (30.48 centimeters) long along the inner curve and also 18 inches (45.72 centimeters) long around the external curve. [3] If you desire a larger border, cut the arcs 4 1/2 inches (11.43 centimeters) wide instead.
Match the internal contour of the brim to the length of your readjusted rectangle if you cut a bigger/smaller circle.
5. Take into consideration cutting some fusible interfacing.
You might want to add interfacing if your fabric is thin. Cut the interfacing 1/2 inch (1.27 centimeters) smaller sized than your pieces, then iron them to the incorrect side of the fabric. You just need to do this for the inner or the external fabric pieces, not both.
[/av_textblock]
[av_image src=’https://jylmachine.com/wp-content/uploads/2022/05/JYL-PM-01-Automatic-Bucket-Hat-Sewing-machine-2-300×300.jpg’ attachment=’1104′ attachment_size=’medium’ copyright=” caption=” image_size=” styling=” align=’center’ font_size=” overlay_opacity=’0.4′ overlay_color=’#000000′ overlay_text_color=’#ffffff’ animation=’no-animation’ hover=” appearance=” link=’manually,https://jylmachine.com/product/baseball-cap-visor-sewing-machine/’ target=’_blank’ title_attr=” alt_attr=” img_scrset=” lazy_loading=’disabled’ id=” custom_class=” template_class=” element_template=” one_element_template=” av_element_hidden_in_editor=’0′ av_uid=’av-l4z02hc2′ sc_version=’1.0′ admin_preview_bg=”][/av_image]
[av_textblock textblock_styling_align=” textblock_styling=” textblock_styling_gap=” textblock_styling_mobile=” size=” av-medium-font-size=” av-small-font-size=” av-mini-font-size=” font_color=” color=” id=” custom_class=” template_class=” element_template=” one_element_template=” av_uid=’av-l4z04670′ sc_version=’1.0′ admin_preview_bg=”]
Component 2: Sewing the Hat.
1. Pin as well as stitch the rectangular shapes with each other.
Pin the two external rectangular shapes together, best sides touching. Sew up both of the slim ends utilizing a 1/2- inch (1.27-centimeter) joint allocation. [4] Repeat this action for both inner fabric items.
2. Pin and also sew the border assemble. Pin both outer border assemble, appropriate sides facing in. Sew along simply the narrow, straight ends. Utilize a 1/2- inch (1.27-centimeter) joint allocation. [5] Repeat this step for the two inner fabric items.
3. Press the seams open on the body and also brim items.
Area one of the body items on the ironing board with the joint encountering you. Utilize your iron to spread out apart the joint. Press the joint level and open. Repeat this action for all of the joints on all of the body and also brim pieces.
4. Pin and also sew the body pieces to the circles.
Pin the top side of the external body piece to the external edge of the matching circle. Make certain that the incorrect sides are dealing with out. Sew around the edge utilizing a 1/2- inch (1.27-centimeter) joint allowance. [6] Repeat this action for the 2 internal fabric items.
5. Pin and stitch the brim to the body.
Pin the internal edge of the matching border around the lower edge of the body piece. Make take legal action against that the incorrect sides are encountering out, after that sew utilizing a 1/2- inch (1.27-centimeter) joint allocation. [7] Repeat this step for the 2 inner fabric items.
[/av_textblock]
[av_image src=’https://jylmachine.com/wp-content/uploads/2022/06/JYL-J430D-feed-off-the-arm-sewing-machine-300×160.png’ attachment=’1593′ attachment_size=’medium’ copyright=” caption=” image_size=” styling=” align=’center’ font_size=” overlay_opacity=’0.4′ overlay_color=’#000000′ overlay_text_color=’#ffffff’ animation=’no-animation’ hover=” appearance=” link=’manually,https://jylmachine.com/product/baseball-cap-visor-sewing-machine/’ target=’_blank’ title_attr=” alt_attr=” img_scrset=” lazy_loading=’disabled’ id=” custom_class=” template_class=” element_template=” one_element_template=” av_element_hidden_in_editor=’0′ av_uid=’av-l4z09ei6′ sc_version=’1.0′ admin_preview_bg=”][/av_image]
[av_textblock textblock_styling_align=” textblock_styling=” textblock_styling_gap=” textblock_styling_mobile=” size=” av-medium-font-size=” av-small-font-size=” av-mini-font-size=” font_color=” color=” id=” custom_class=” template_class=” element_template=” one_element_template=” av_uid=’av-l4z05h51′ sc_version=’1.0′ admin_preview_bg=”]
Part 3: Assembling the Hat.
1. Tuck one hat right into the various other.
Transform one hat appropriate side out; leave the other one as it is. Tuck the initial hat into the 2nd one to make sure that the ideal sides are pressed together and also the wrong sides are encountering out.
2. Pin as well as sew around the outer edge of the brim.
Stitch using a 1/2- inch (1.27-centimeter) joint allowance. Leave a 4-inch (10.16-centimeter) large space for transforming. Eliminate the pins as you sew.
3. Cut notches right into the joints to minimize mass.
Cut a notch every 3/4 inch (1.91 centimeter) to the seam around the top of the hat. Cut a notch fully (2.54 centimeters) to the joint around the outer edge of the brim. The notches require to be just under 1/2 inch (1.27 centimeters) so that they don’t cut right into the stitching.
You do not require to cut notches into the seam in between the body and also brim items.
4. Turn the hat inside out via the void.
Shape the hat to make sure that one piece is put right into the various other. If you need to, utilize a skewer or knitting needle to assist press out the joints along the brim.
[/av_textblock]
[av_image src=’https://jylmachine.com/wp-content/uploads/2022/06/JYL-IC004-CAP-ironing-machine-300×300.jpg’ attachment=’1586′ attachment_size=’medium’ copyright=” caption=” image_size=’magazine’ styling=” align=’center’ font_size=” overlay_opacity=’0.4′ overlay_color=’#000000′ overlay_text_color=’#ffffff’ animation=’no-animation’ hover=” appearance=” link=’manually,https://jylmachine.com/product/baseball-cap-visor-sewing-machine/’ target=’_blank’ title_attr=” alt_attr=” img_scrset=” lazy_loading=’disabled’ id=” custom_class=” template_class=” element_template=” one_element_template=” av_element_hidden_in_editor=’0′ av_uid=’av-l4z08ppd’ sc_version=’1.0′ admin_preview_bg=”][/av_image]
[/av_one_full][av_textblock textblock_styling_align=” textblock_styling=” textblock_styling_gap=” textblock_styling_mobile=” size=” av-medium-font-size=” av-small-font-size=” av-mini-font-size=” font_color=” color=” id=” custom_class=” template_class=” element_template=” one_element_template=” av_uid=’av-l4z06wom’ sc_version=’1.0′ admin_preview_bg=”]
Part 4: Finishing the Hat.
1. Press the gap and also tuck closed.
Tuck the sides of the gap in by 1/2 inch (1.27 centimeters) to make sure that they pair up with the remainder of the brim. When you are done, Press the brim flat with an iron.
2. Topstitch around the external edge of the border.
Stitch 1/4 to 1/2 inch (0.64 to 1.27 centimeters) away from the outer edge of the brim.
3. Add a lot more rows of topstitching to the brim.
You do not need to do this, yet it will make your hat look even more professional. Just topstitching around the brim for 4 to 5 even more rows. Leave a 1/4 to 1/2 inch (0.64 to 1.27 centimeters) space between each row. [8]
4. Topstitch the top and also body of the hat, if wanted.
Once more, if you don’t have to do this, however it’ll provide you hair a wonderful touch. Topstitch around the leading edge of the body part, 1/4 inch (0.64 centimeter) far from the joint. Next, topstitch around the bottom side of the body part, likewise 1/4 inch (0.64 centimeter) far from the joint. [9]
[/av_textblock]